Before you can book a load in Techvia TMS you need three kinds of records: a customer to bill, facilities to pick up from and deliver to, and a carrier to haul it. Each is added from its own page under Operations, and each one uses the same layout: a form split into tabs, with a save button that stays put at the top and bottom of the page. This guide shows the fields you actually need and the ones that will stop you if you skip them.
It’s part three of a series. If you haven’t yet, start with setting up your account and adding a dispatcher.
Add a customer
Go to Operations → Customers and click the add button. A customer form has four tabs: General, Addresses, Contacts and Notes.
General
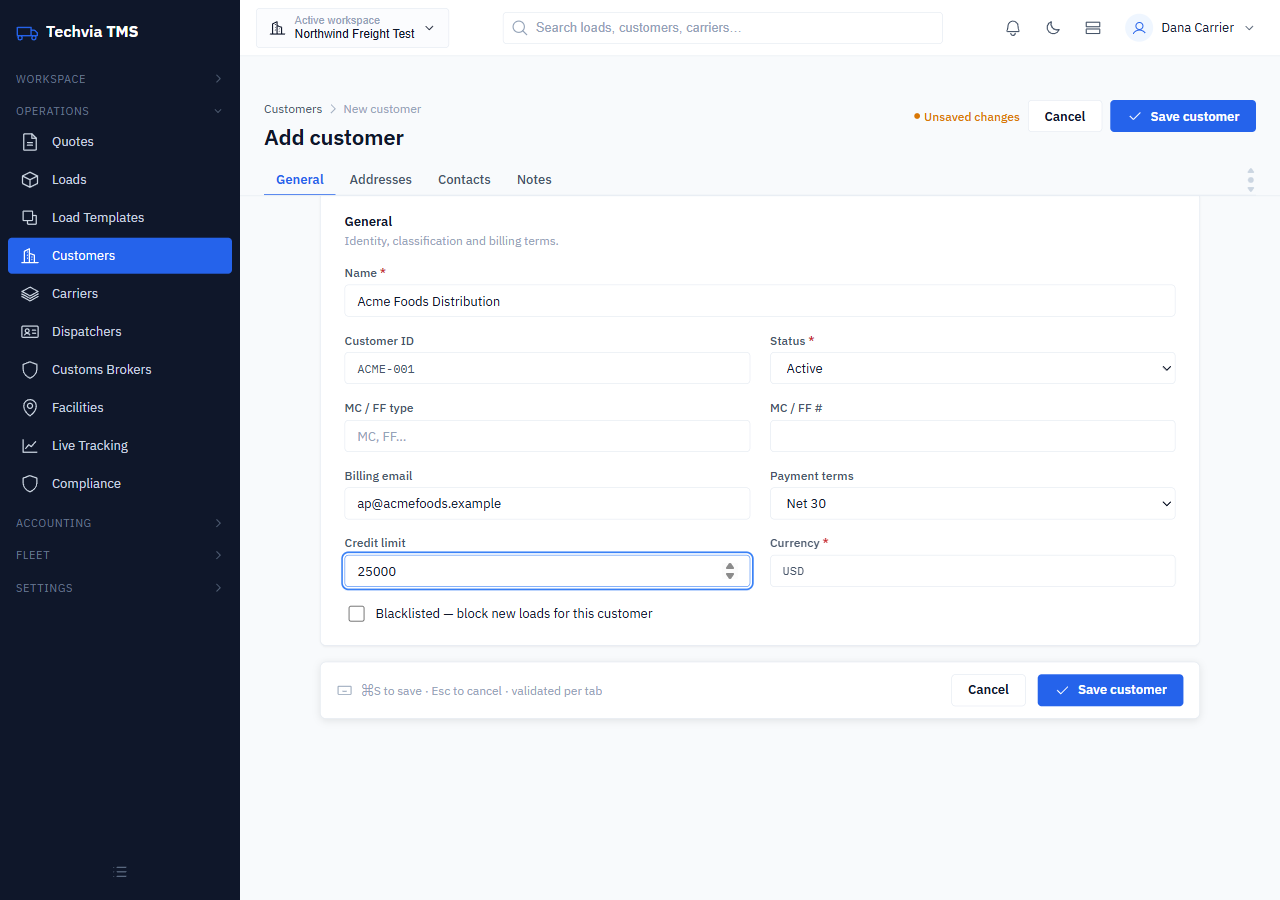
Name is the only field you have to type (Status and Currency come pre-set), but a few others are worth filling in now because they flow into your invoices later:
- Customer ID is your own reference, such as an account code.
- MC / FF type and number for customers that are themselves brokers or forwarders.
- Billing email is where accounts payable lives.
- Payment terms sets how long they have to pay (Due on Receipt, Net 15, Net 30, Net 45 or Net 60).
- Credit limit and Currency (USD by default).
- Blacklisted blocks new loads for that customer. Handy for the account that never pays.
Addresses (this tab is required)
This is the one that trips people up. If you fill in the General tab and click Save customer, Techvia jumps you to the Addresses tab and shows red errors, because a customer needs both a physical address and a billing address, each with street, city, state, ZIP and country.
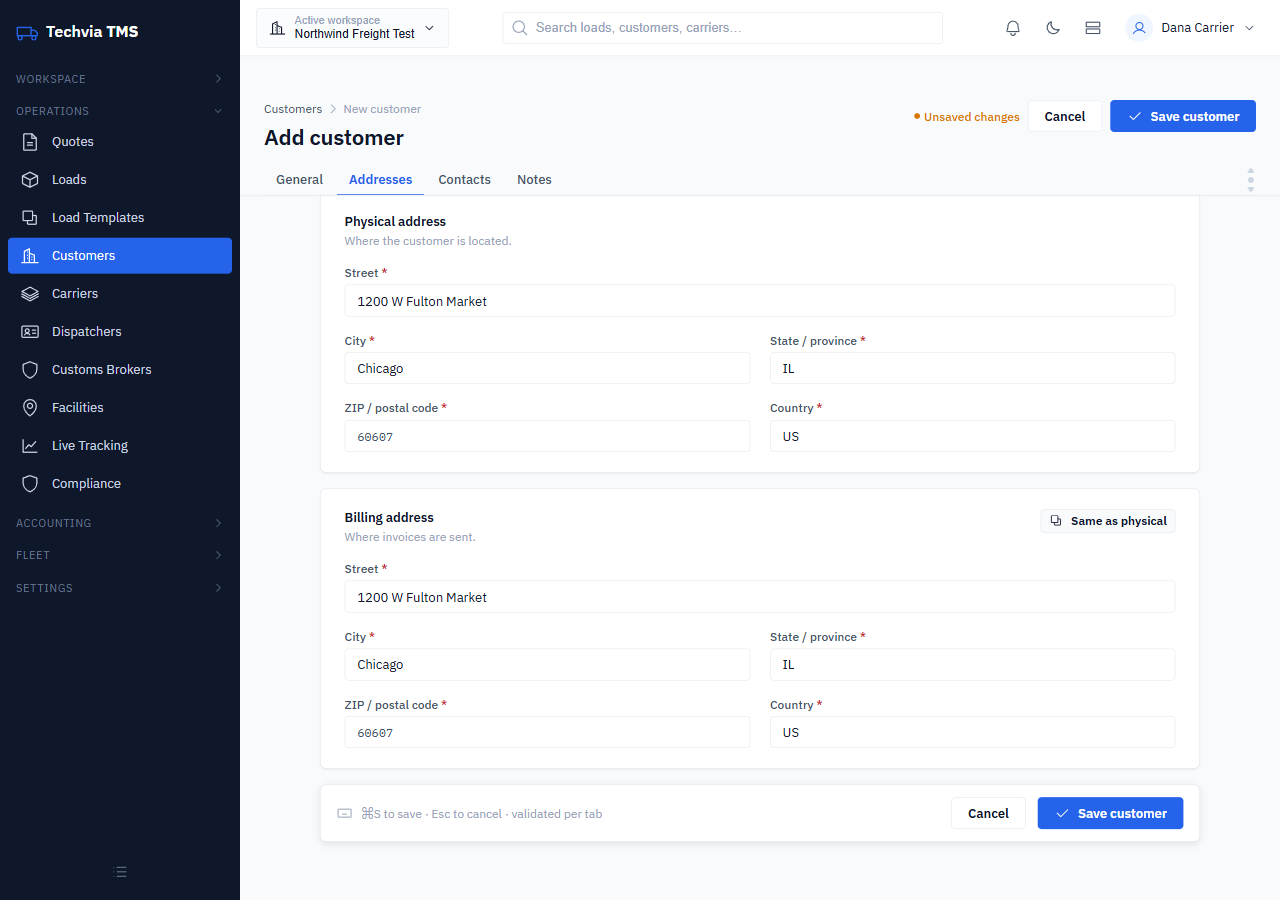
If they’re the same, fill in the physical address and click Same as physical on the billing card. The tab label shows a count of what’s still missing, so you can see at a glance how much is left.
Contacts
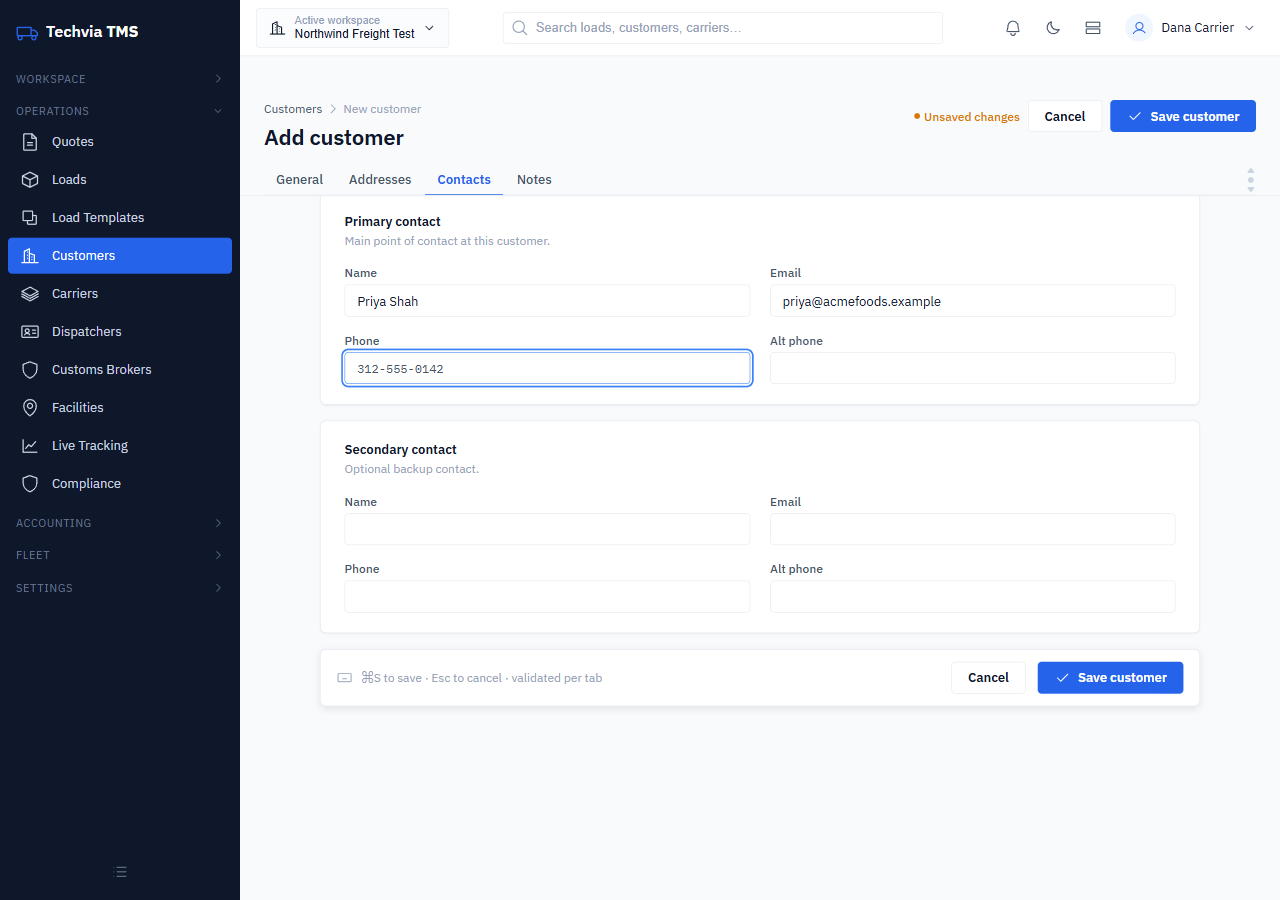
Add a primary contact and, if you like, a backup. Both are optional, but a name and phone number save a lot of digging later when a delivery goes sideways.
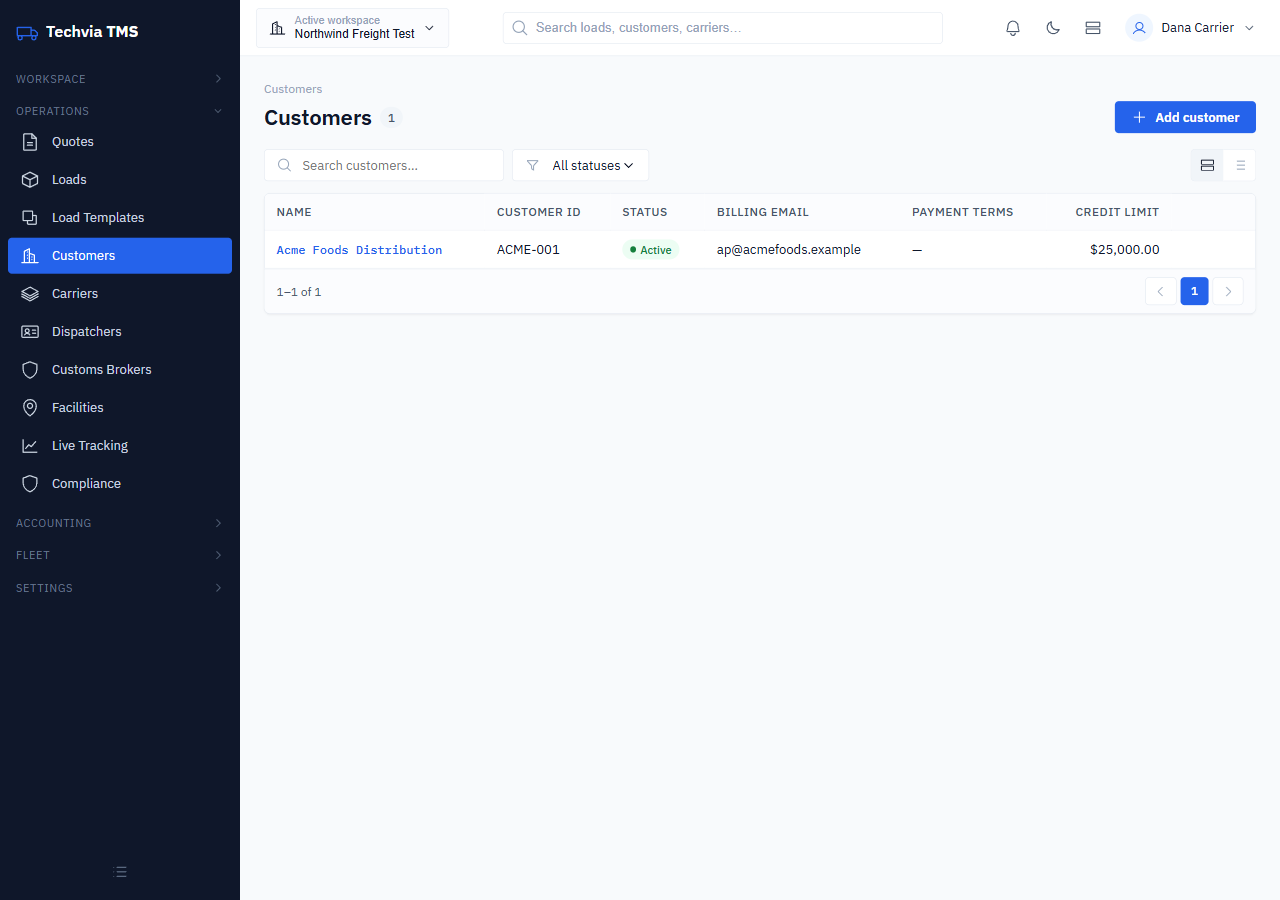
Click Save customer and you’ll see it in your list.
Add facilities
A facility is any place freight is picked up or delivered: the shipper’s warehouse, the receiver’s dock. Go to Operations → Facilities and add one for each end of your first lane: one for the pickup and one for the delivery.
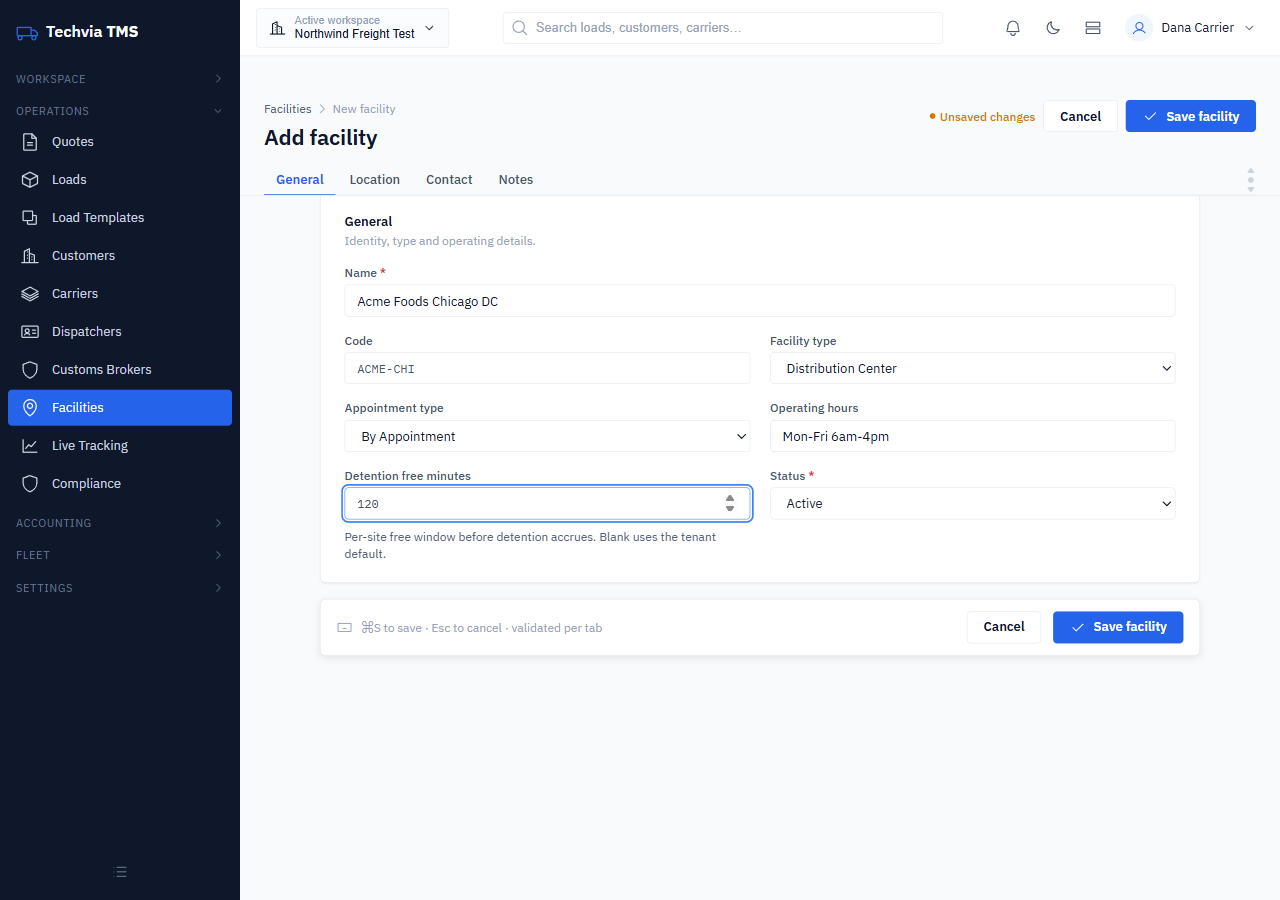
On the General tab, Name is the only field you have to type. The optional fields are worth a minute:
- Facility type: warehouse, distribution center, port, terminal or customer site.
- Appointment type: first come first served, or by appointment.
- Operating hours, in plain text such as “Mon-Fri 6am-4pm”.
- Detention free minutes: how long a driver can wait before detention starts to accrue at this site. Leave it blank and Techvia uses your workspace default. (Detention billing is covered in detention and accessorial billing that actually gets paid.)
Location
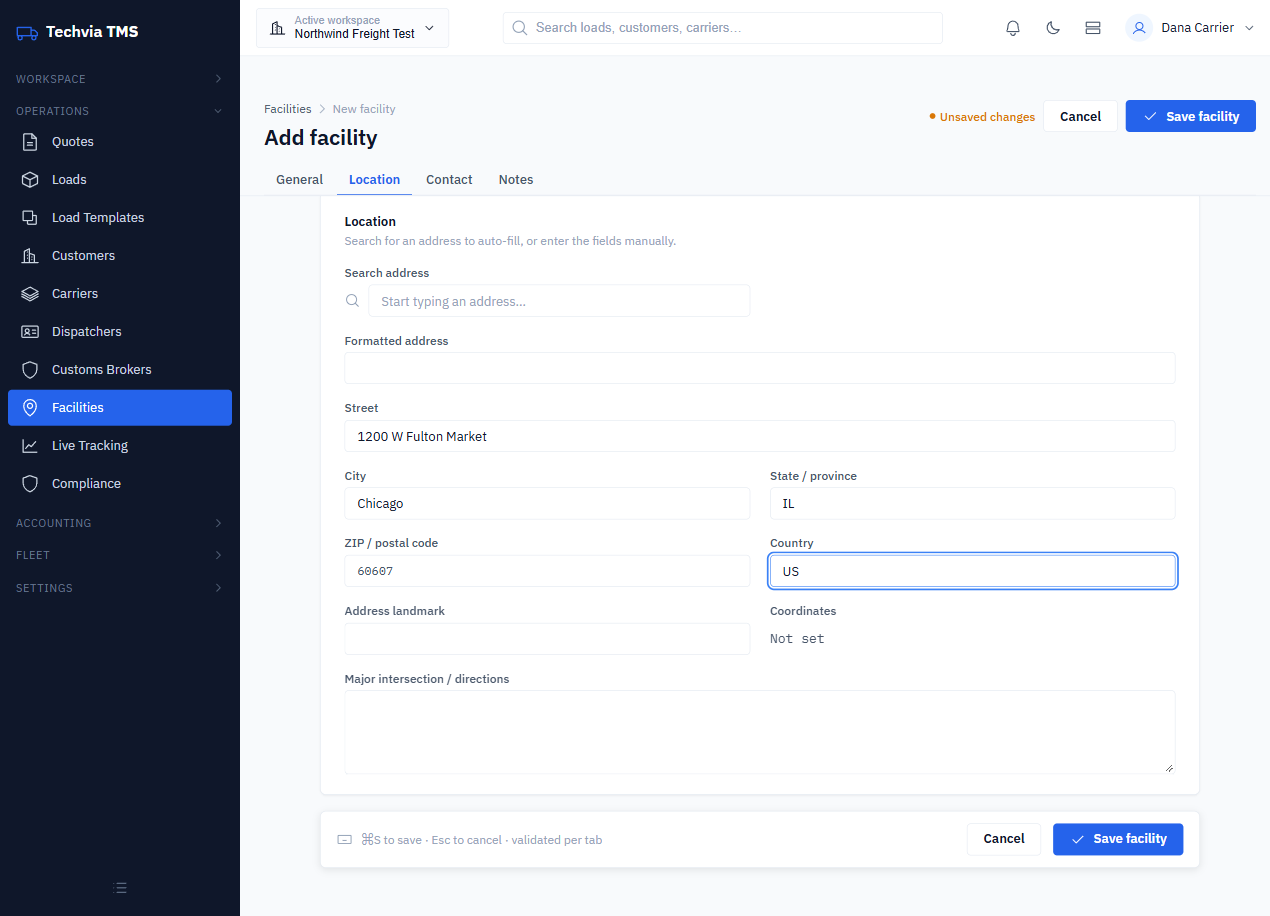
On the Location tab, use Search address and pick the match, and the fields fill themselves in. You can also type everything by hand. The difference matters: the address search fills in the facility’s coordinates (typing the address by hand leaves them showing “Not set”), and Techvia works out the facility’s time zone from those coordinates. When we entered a facility by hand and then added it to a load, the stop time was shown in our time zone with a note that the facility’s zone was unknown. If your loads cross time zones, pick from the search results.
Add a carrier
A carrier is the outside company that will haul the freight. Go to Operations → Carriers and add one. The form has tabs for General, Address, Contacts, Insurance, Notes, Drivers and Trucks.
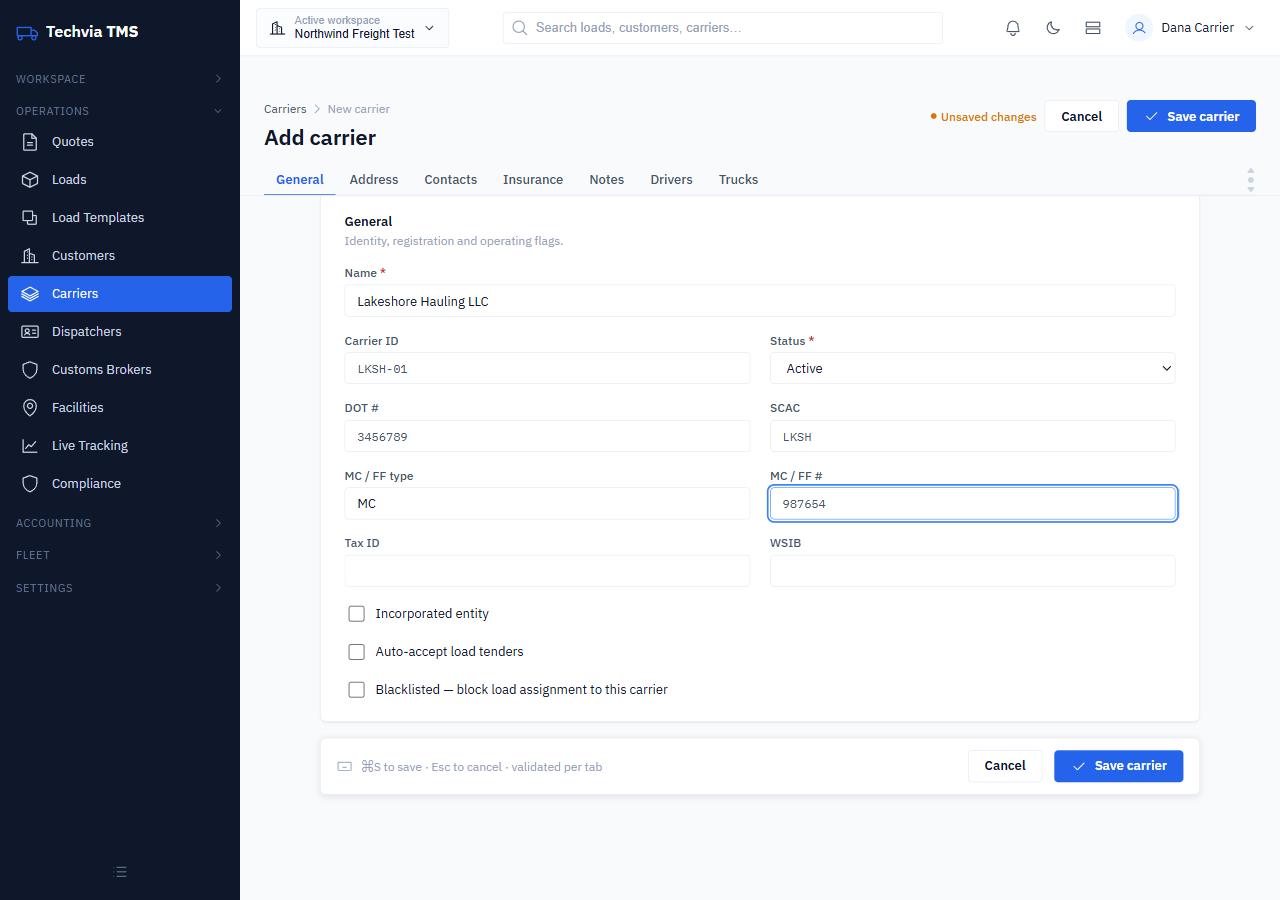
On General, Name is the only field you have to type, but add the DOT number, MC number and SCAC if you have them. Those are the identifiers you’ll use when vetting a carrier. The same tab has checkboxes for Auto-accept load tenders and for Blacklisted, which blocks assigning loads to that carrier.
The Address tab is required, like the customer one: street, city, state, ZIP and country for the carrier’s place of business.
Insurance
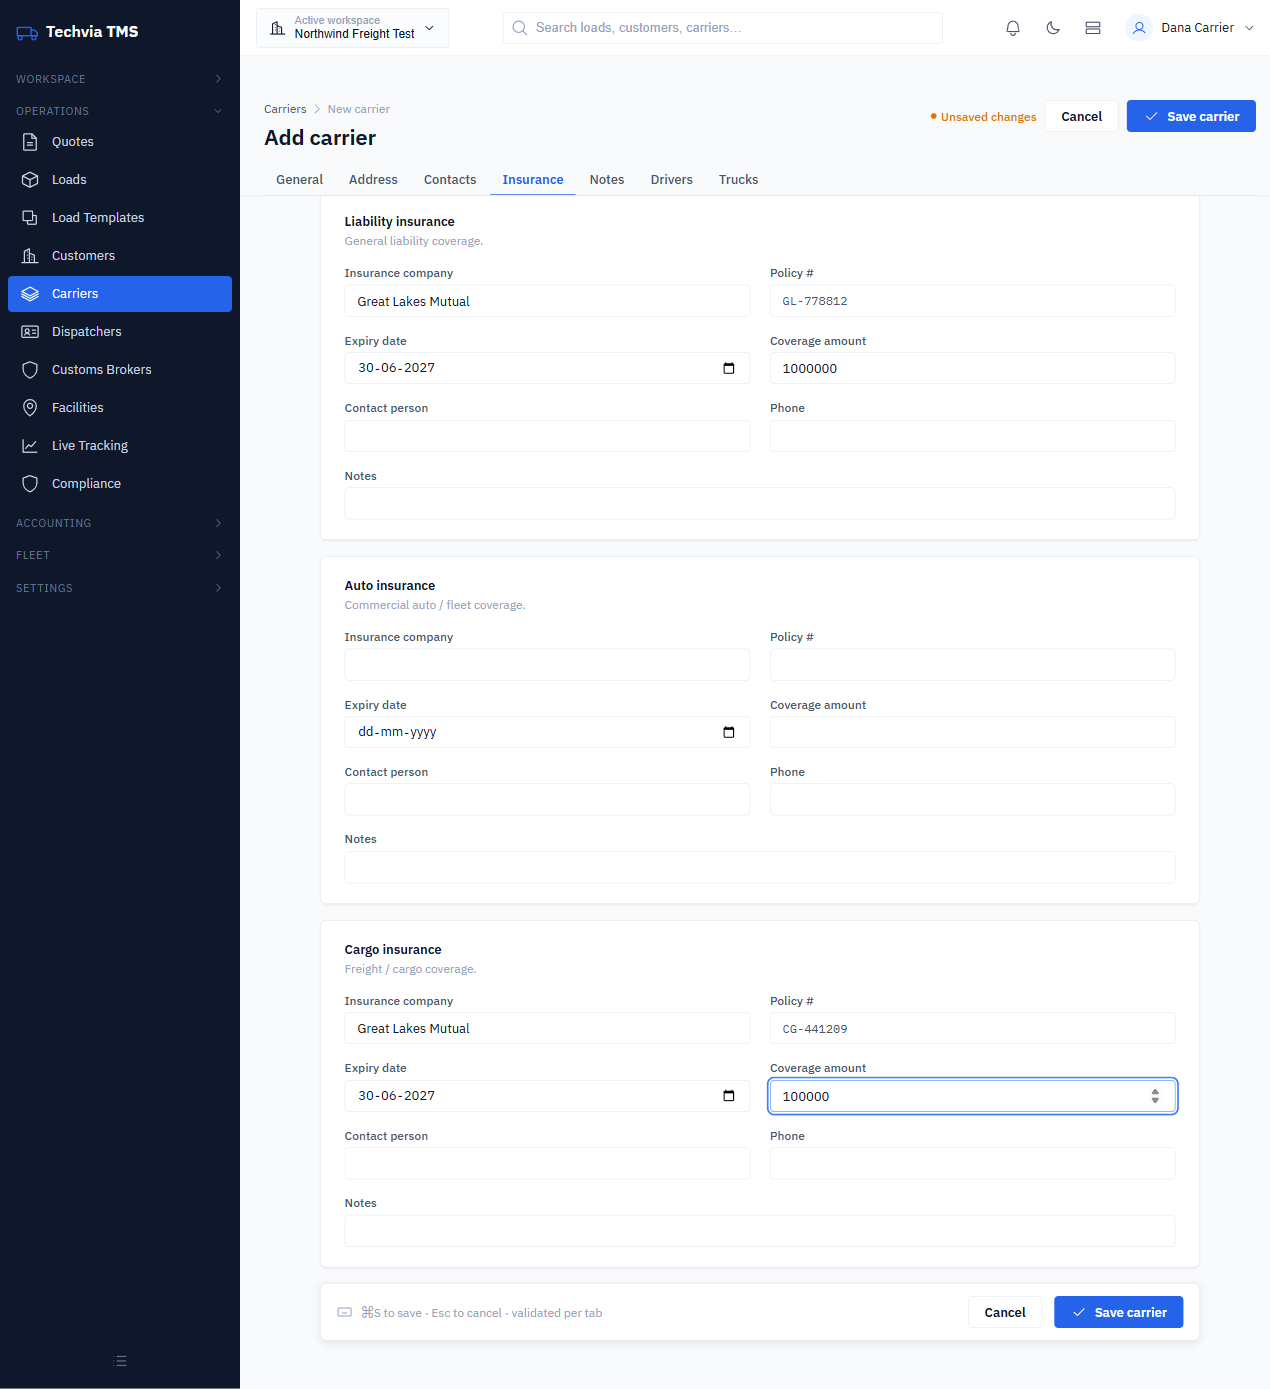
The Insurance tab has three blocks: liability, auto and cargo. Each takes the insurance company, policy number, expiry date, coverage amount and a contact. Fill these in before you assign the carrier to a load. Insurance is exactly the sort of detail that gets missed until a claim, and keeping the expiry dates on the record means the answer is a click away. The carrier onboarding checklist for brokers covers what else to collect.
Click Save carrier. Your carrier is ready to be assigned.
You’re ready for a load
You now have everything a load needs: a customer to bill, two facilities for the stops, a carrier to haul it and, from the last guide, a dispatcher. Next up is creating and assigning your first load.
Try it yourself
Techvia TMS is $49 a month with unlimited users and trucks, and you can set up all of this without a credit card.