In Techvia TMS a quote takes a customer, a lane and your rate. The app suggests a sell rate from your own history on that lane, you move the quote from Draft to Sent to Won, and one click on Convert to load creates the load with the customer, lane, equipment and rate already filled in. This guide walks through each step with screenshots from a real quote.
If you haven’t set up customers and facilities yet, start with adding customers, facilities and carriers.
Build the quote
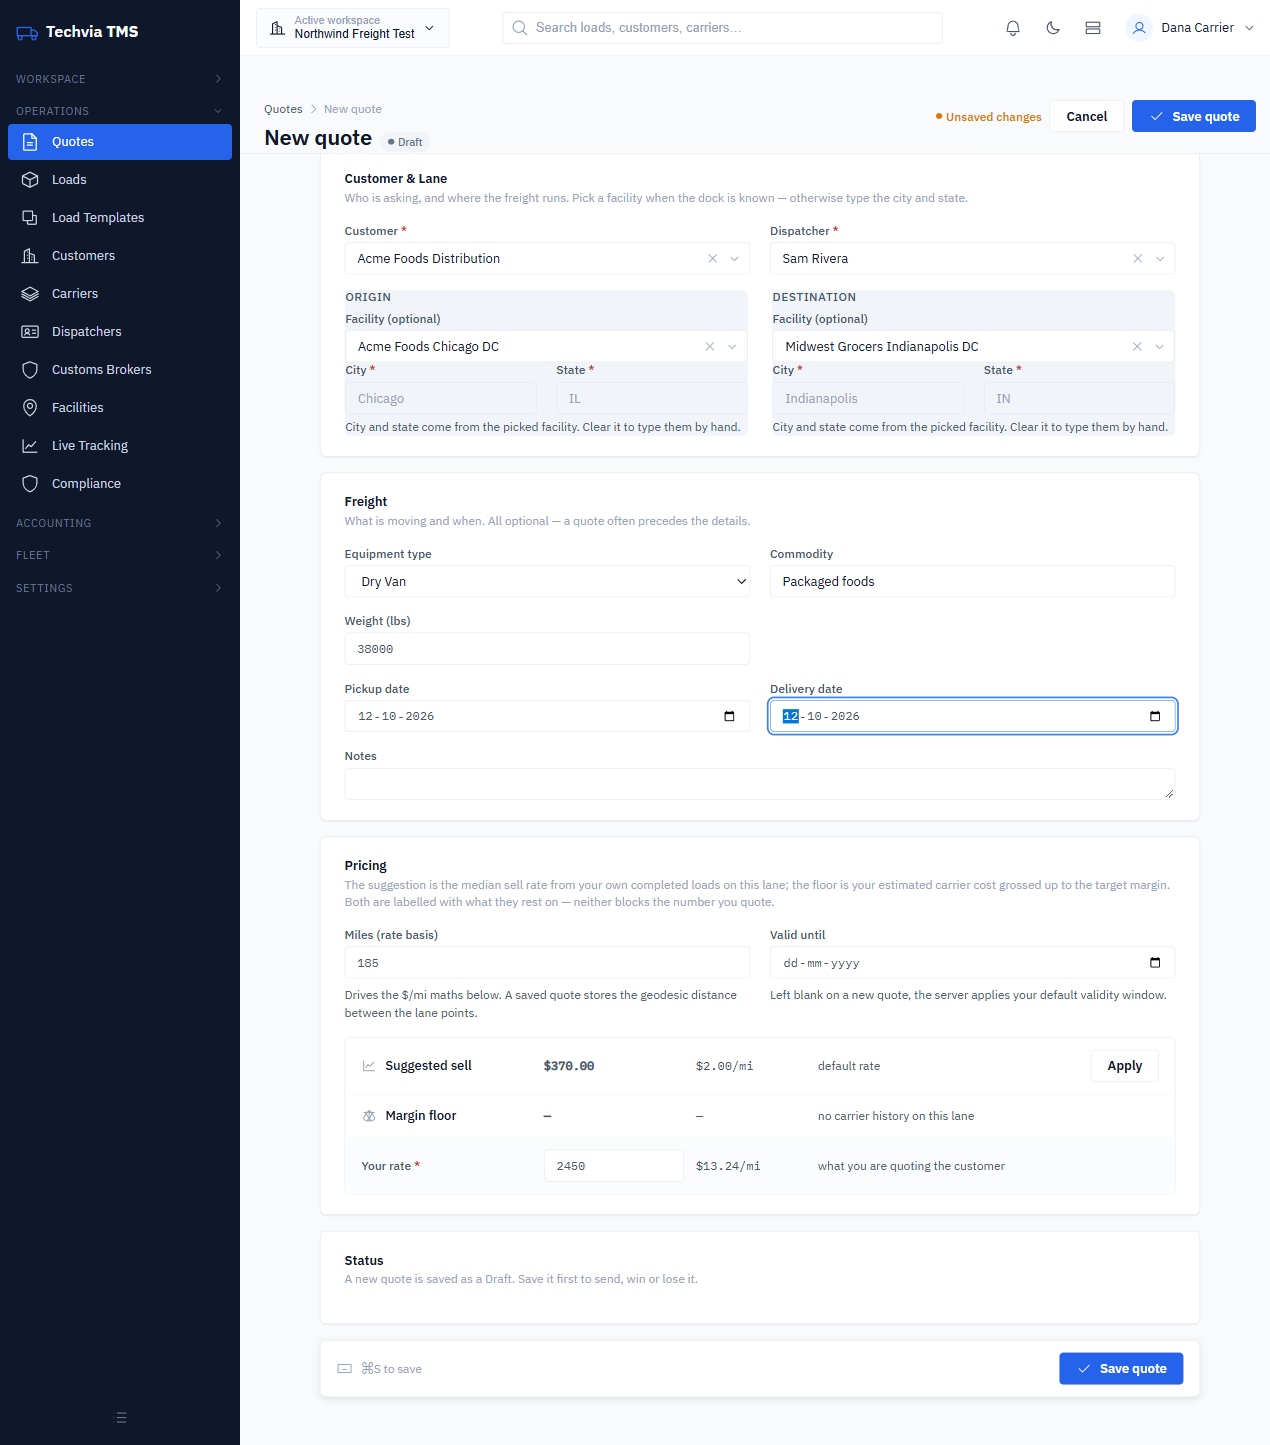
Go to Operations → Quotes and start a new quote. The form has four parts: Customer & Lane, Freight, Pricing and Status.
Customer and lane
Pick the customer and dispatcher, then set each end of the lane. If you know the dock, pick a saved facility, and the city and state fill themselves in. If you don’t know the dock yet, which is normal at quote stage, clear the facility and type a city and state instead.
Freight
Equipment, commodity, weight and pickup and delivery dates are all optional. The form says so itself: “a quote often precedes the details.” Fill in what the customer gave you.
Read the pricing panel
This is where Techvia is different from a blank spreadsheet. Once the customer and both ends of the lane are set, the pricing panel shows two numbers side by side:
- Suggested sell is the median rate you actually charged on completed loads for this lane, shown as a total and as $/mile.
- Margin floor is your historical carrier cost on the lane, grossed up to your target margin. Quote below it and the lane loses money.
Each number is labelled with what it rests on. When there’s enough history for that customer on that lane, the suggestion comes from exactly that. With less history it falls back step by step to any customer on the lane, then your company-wide average, then the default rate you set in Settings → Quoting. In the screenshot there was no usable history yet, so it reads “default rate” at $2.00/mile. Your numbers will improve as completed loads build up.
Two tips so the suggestion has something to work with:
- Enter Miles. The $/mile maths runs off it, and without miles the panel can’t price the lane.
- Use geocoded facilities (pick the address from search when you create them). Lane history is calculated per mile, so loads between facilities with no coordinates don’t add to it.
Type your rate and the panel shows it as $/mile next to the suggestion, so you can see at a glance whether you’re above or below your own history. Neither number stops you quoting what you want. For the thinking behind a per-mile rate, see how to calculate freight rate per mile.
Click Save quote. It gets a number (ours was QT-000001), starts as a Draft, and gets a Valid until date from your default validity window if you left it blank.
Track the outcome
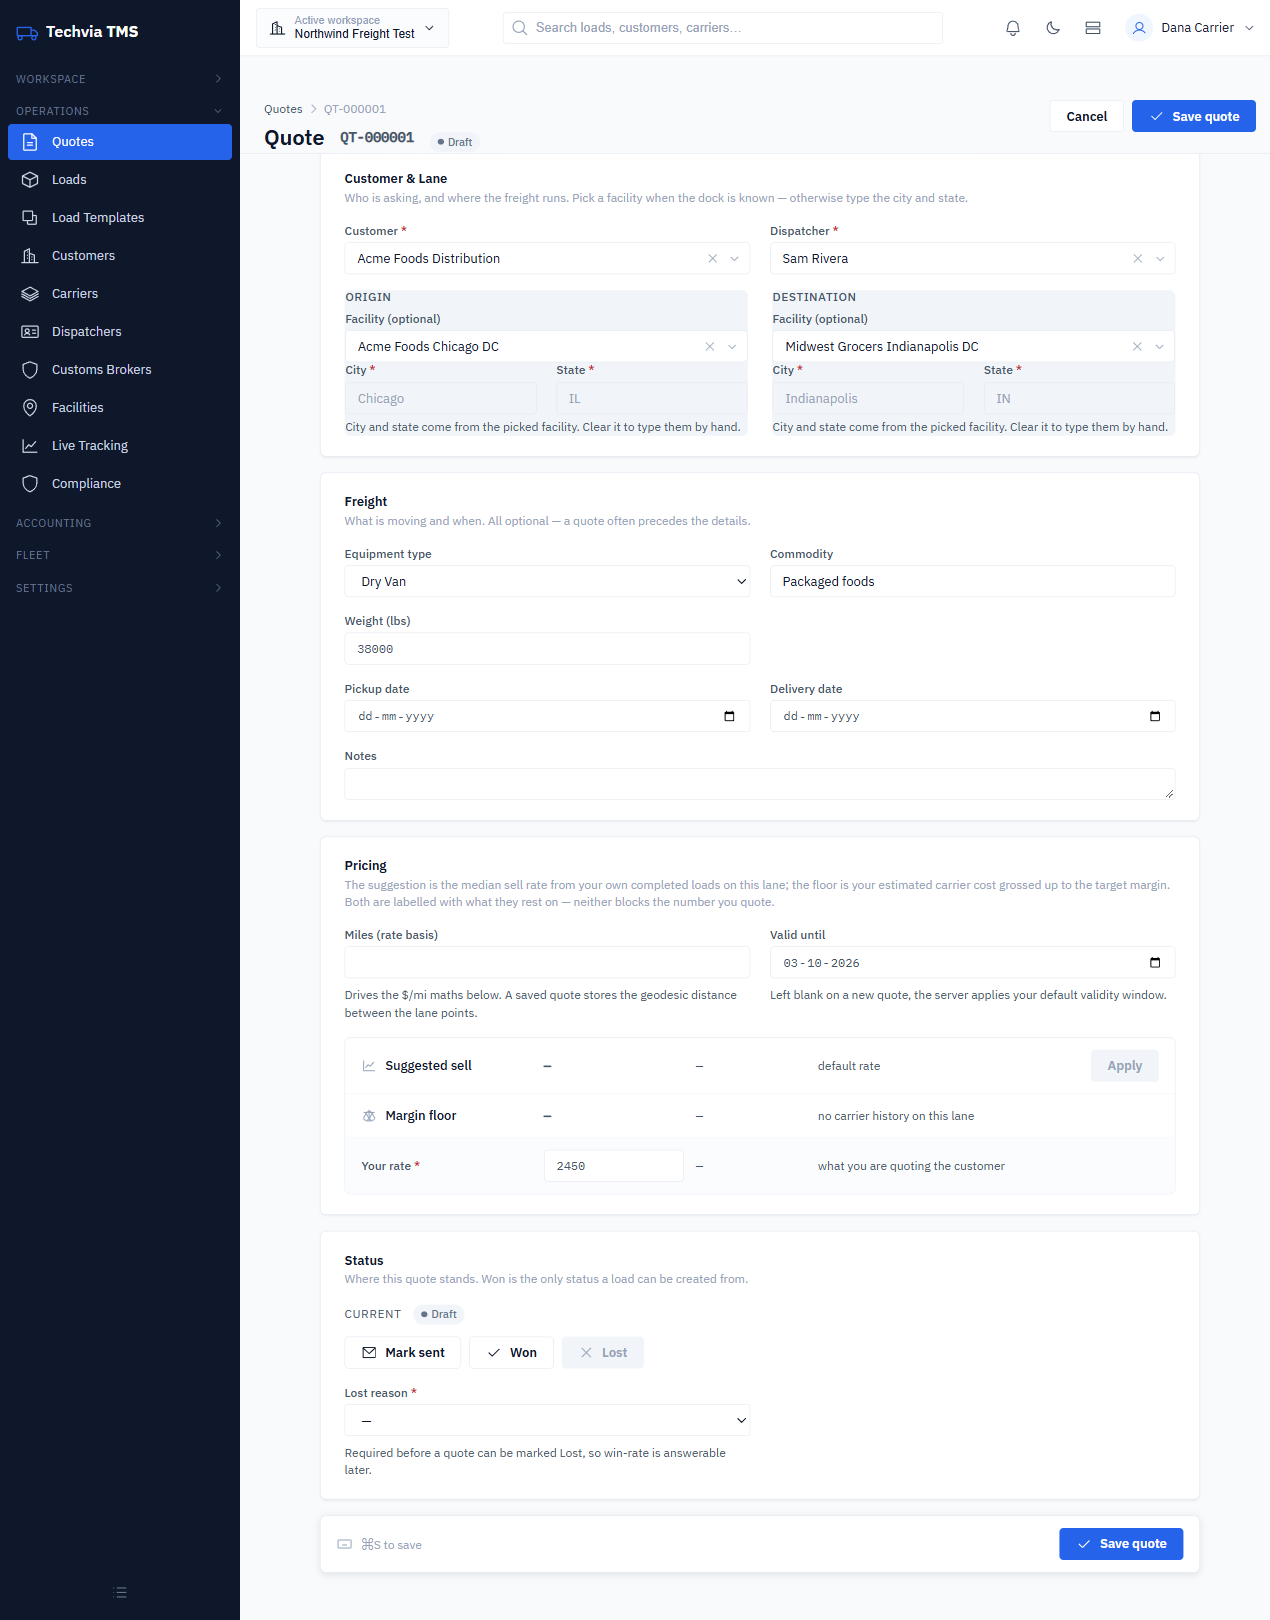
The Status section on a saved quote has three buttons:
- Mark sent when it’s gone to the customer.
- Won when they book it.
- Lost, which needs a reason first: Price, Capacity, Timing or No Response. That’s deliberate, so you can see later why you lose quotes rather than just how many.
Quotes past their valid-until date expire automatically.
Convert to load
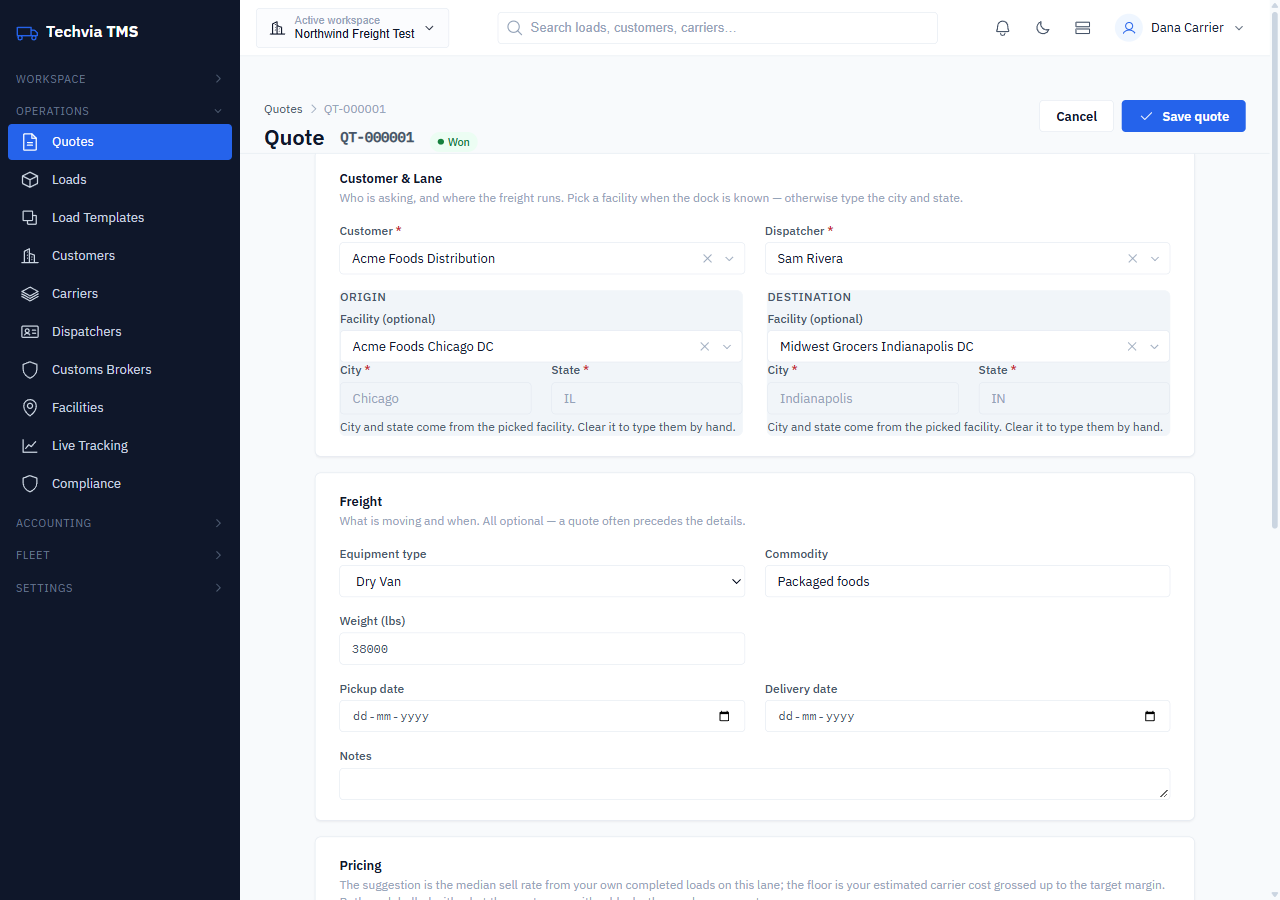
Once a quote is Won, a Convert to load button appears. Won is the only status a load can be created from. Click it and you land on a brand-new load, in our case L-2026-000002, with:
- the customer and dispatcher,
- the origin and destination as a Shipper stop and a Consignee stop,
- the equipment type,
- your quoted rate as the load rate.
Conversion is safe to double-click. We tried, and it produced exactly one load.
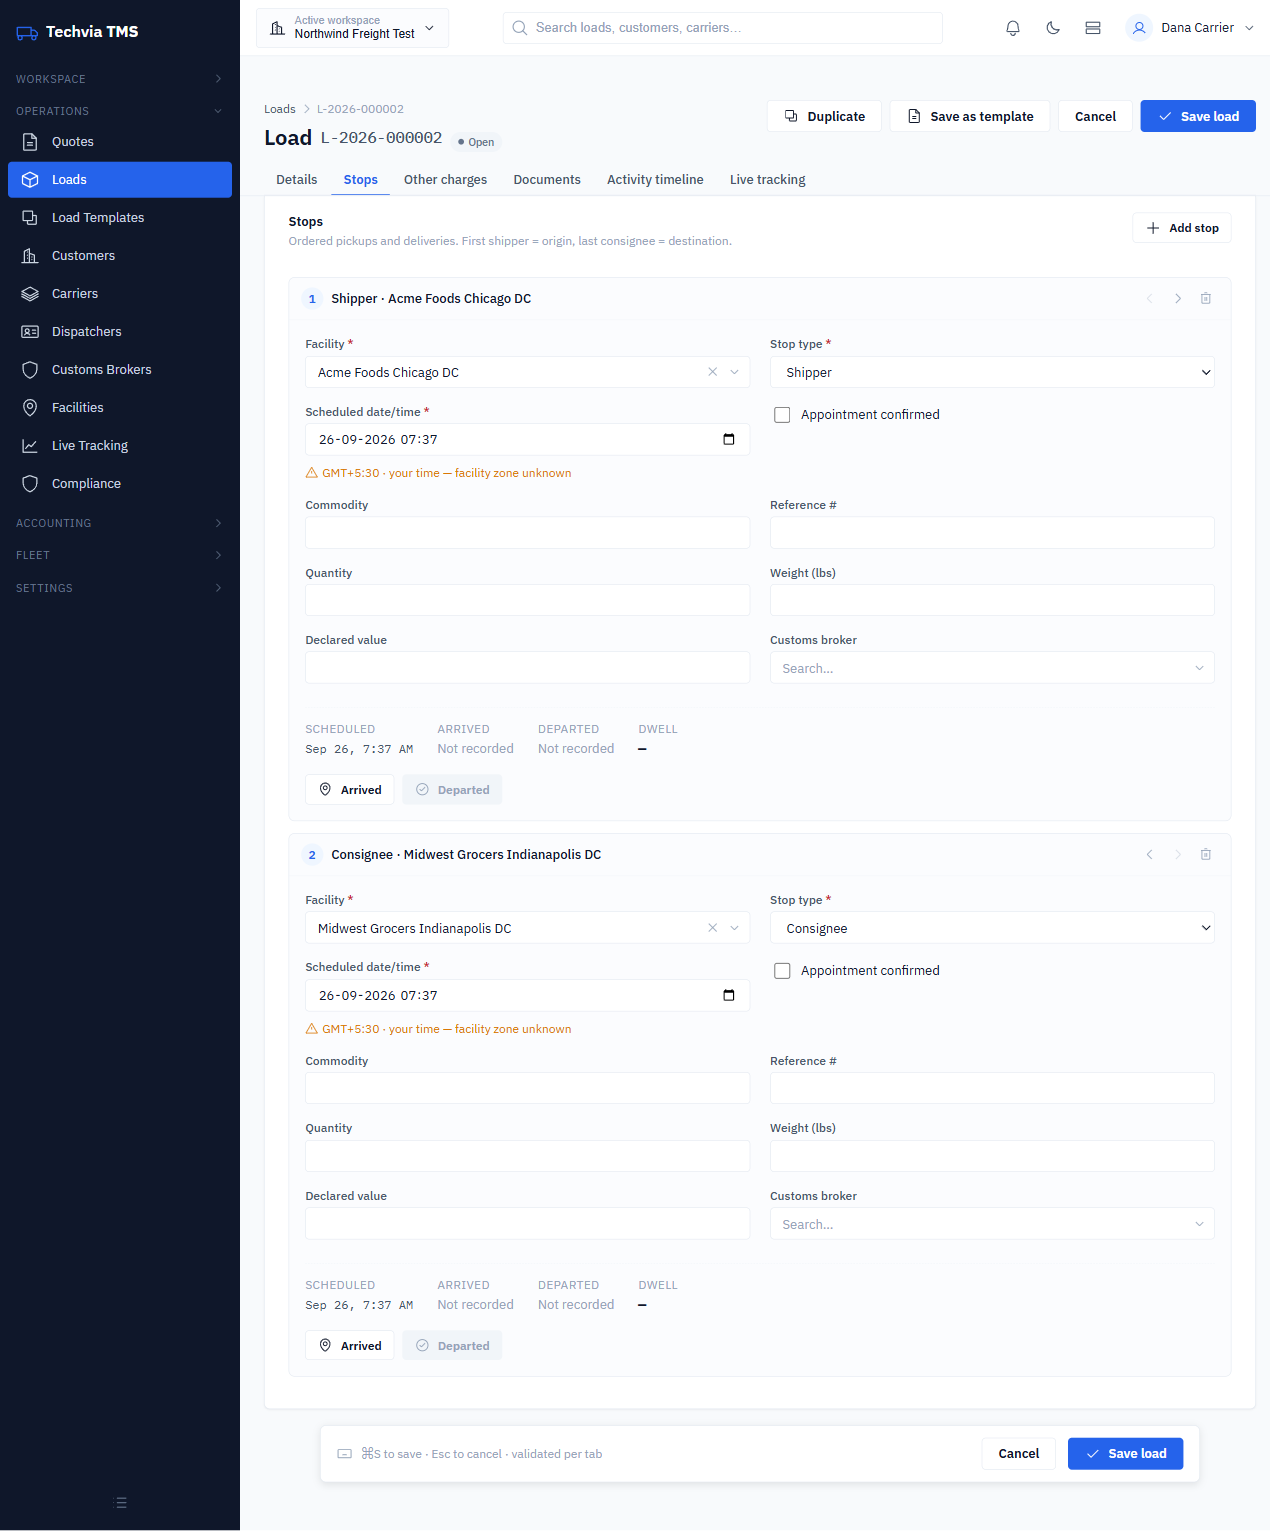
Check the stop times before you dispatch. If the quote had no pickup or delivery dates, the converted stops still get a scheduled time, which in our test was the moment we converted. Set the real appointment times right away, because stop times feed everything downstream, from the dispatch board to customer tracking.
From here the load works like any other. Assign a carrier or driver and track it: see how to create and assign your first load.
Try it yourself
Techvia TMS prices lanes from your own history, not a market index. It’s $49 a month with unlimited users, and no credit card is needed to start.