In Techvia TMS, invoicing a load starts with one action: set the load’s status to Completed. The moment you save it, Techvia creates a draft invoice from the load’s rate and stops. From there you check the details, mark it Sent, download the PDF for your customer and, when the money arrives, click Record payment. This last guide in the series follows one load from Completed to Paid.
If you’re arriving here first, the load in this example was built in how to create and assign your first load.
Step 1: Mark the load Completed
Open the load, change Status to Completed and save. That’s the trigger. A load that’s merely Delivered isn’t billable yet in Techvia, so make sure your team knows to complete loads once the paperwork is in. (If you chase proof of delivery, the POD collection workflow is the step that should come right before this.)
Go to Accounting → Invoices. There’s already an invoice waiting.
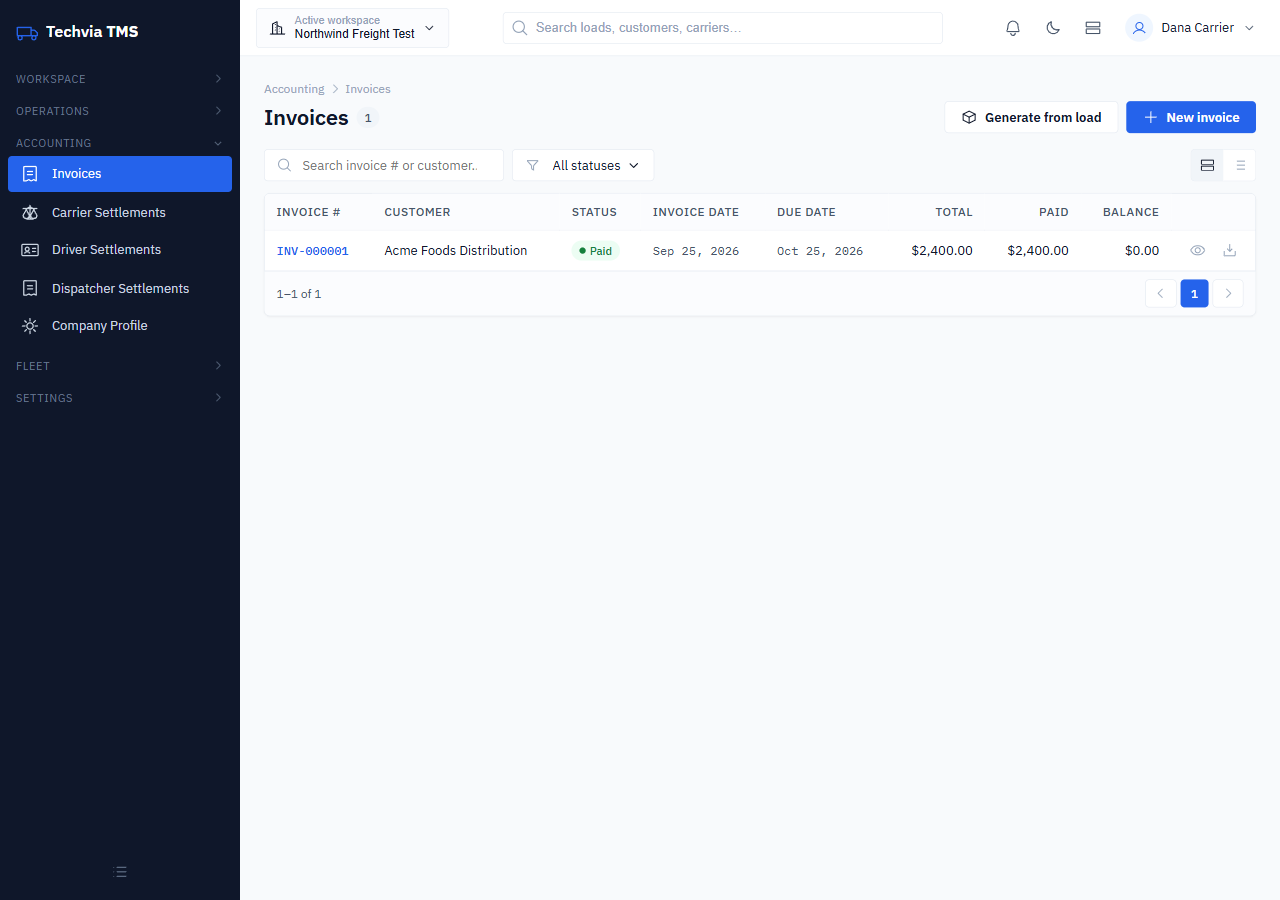
The two buttons at the top right are worth knowing:
- Generate from load lists completed loads that don’t have an invoice yet. It’s a safety net: if an automatic invoice ever fails to draft, the load shows up here instead of slipping through unbilled. Because our load already has an invoice, the list is empty.
- New invoice creates a manual invoice that isn’t tied to a load.
Invoices move through the statuses Draft, Sent, PartiallyPaid, Paid and Void, and you can filter the list by any of them.
Step 2: Review the draft
Click the invoice number to open it. You’ll land on the General tab.
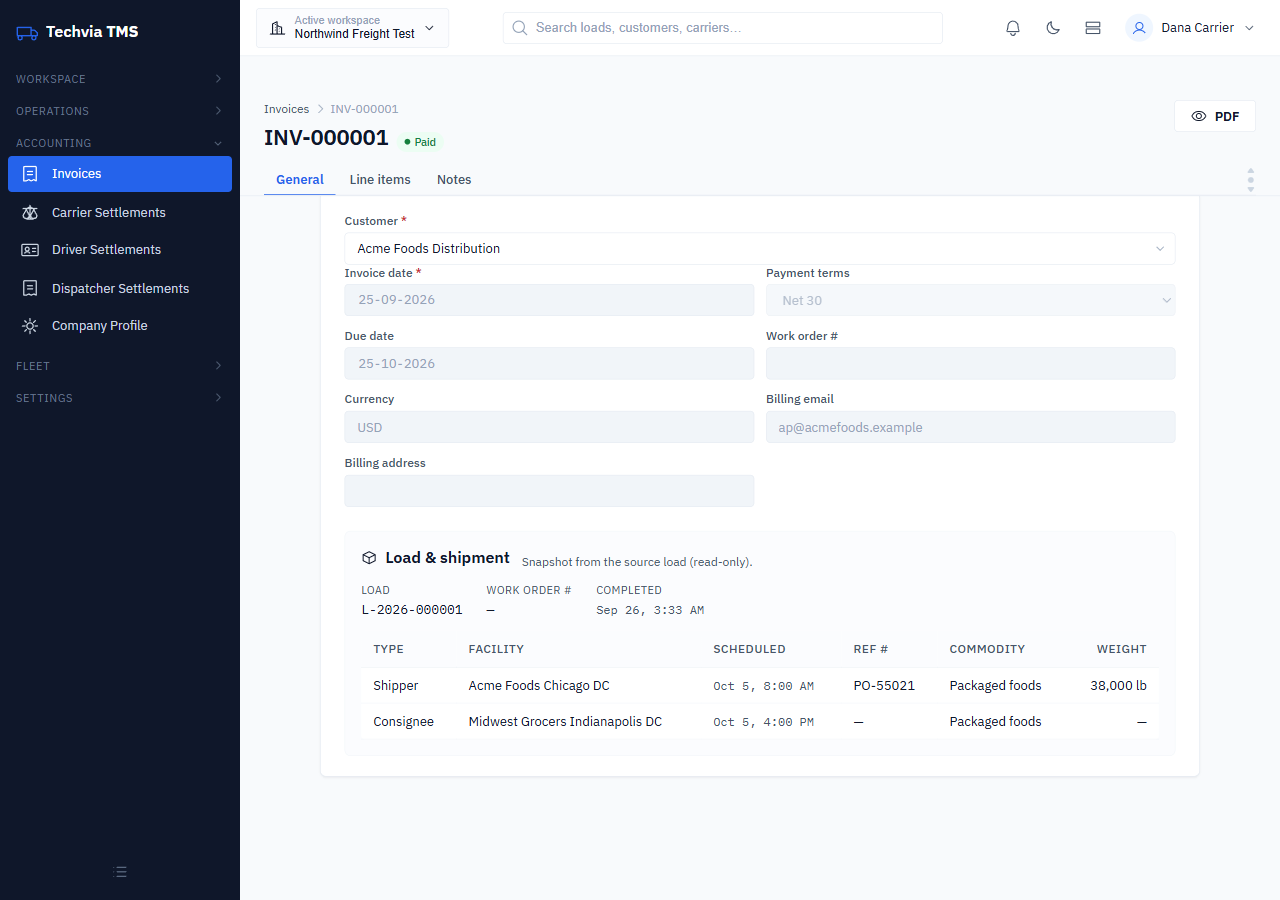
What’s on it:
- Customer, invoice date and payment terms. The due date is worked out from the terms, and in our example it landed 30 days after the invoice date.
- Currency, work order #, billing email and billing address.
- A read-only Load & shipment box that snapshots the load number, completed time and every stop (facility, scheduled time, reference, commodity and weight).
Check the billing email and address before you send anything. In our test they were blank on the generated invoice even though the customer record had a billing email, so fill them in here if yours are empty. While the invoice is still a draft you can edit any of these fields and click Save invoice.
Line items
The Line items tab shows what you’re charging.
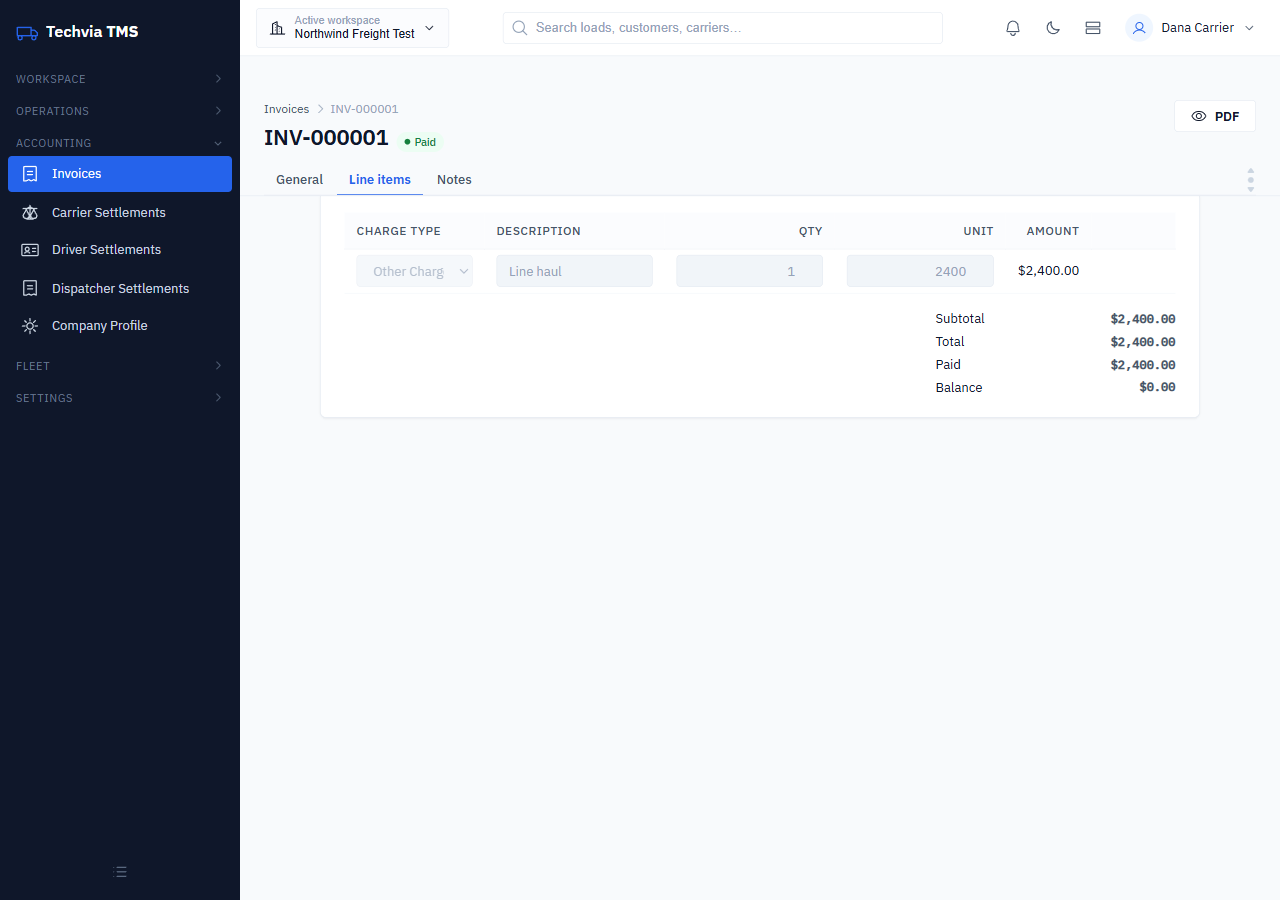
Techvia adds one Line haul line from the load’s rate, plus a line for each other charge on the load. Below the lines you get Subtotal, Total, Paid and Balance. For accessorials like detention and layover, see detention and accessorial billing that actually gets paid.
Put your company on the PDF
Before the first invoice goes out, open Accounting → Company Profile. Whatever you enter there prints as the From / Remit-to block on every invoice PDF: company name, address, phone, email, EIN or MC number, and free-text remit instructions (bank or ACH details, “make checks payable to”). The same page holds your SCAC for EDI. When we filled it in, the next invoice PDF showed all of it, with the remit instructions under the totals.
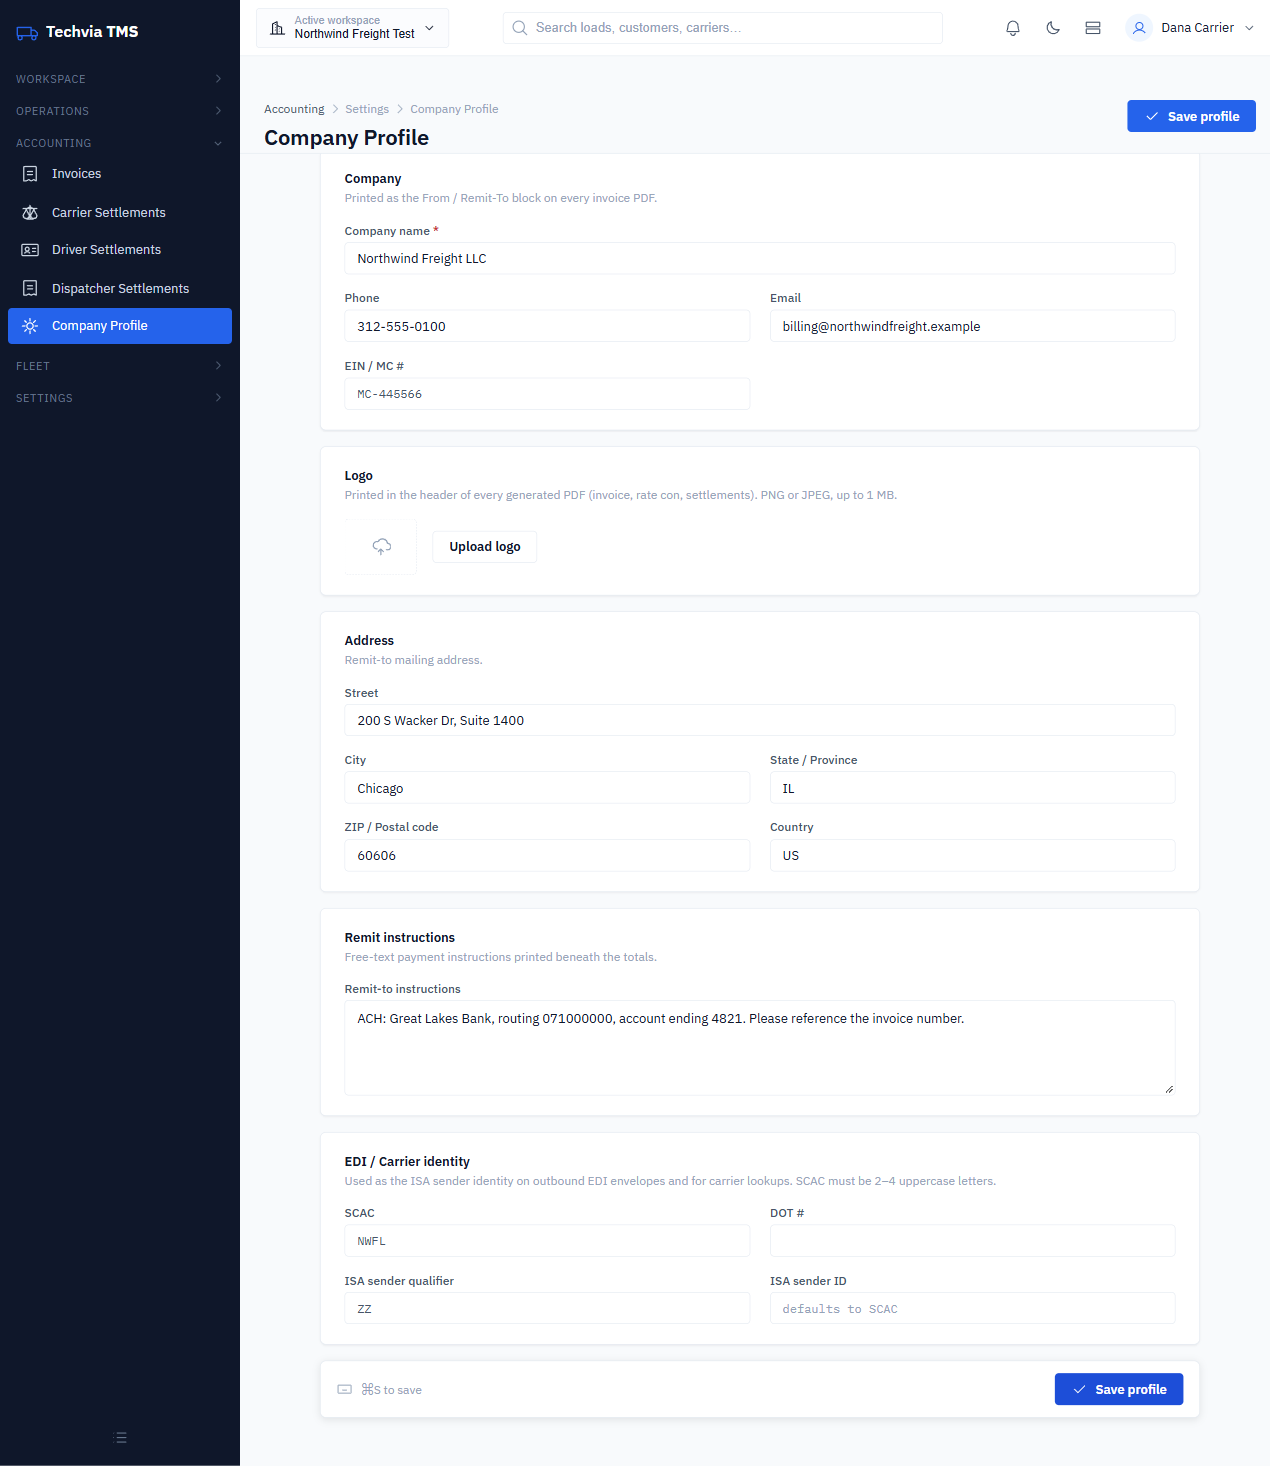
Do this on day one. Until it’s filled in, the PDF header only shows your workspace name.
Step 3: Send it
The buttons across the top of a draft are Save invoice, PDF, Send and Void.
- PDF downloads the invoice as a PDF file named after the invoice number (ours came down as
INV-000001.pdf), ready to email or upload to a customer portal. - Send changes the invoice’s status to Sent and locks the invoice fields.
One thing to be clear about: in the version we tested, Send updates the status; it doesn’t email the customer for you, despite the “Invoice sent” message. Download the PDF and send it the way you normally would, and use the Sent status to track what’s outstanding.
Step 4: Record the payment
Once an invoice is Sent, a Record payment button appears. Click it and a bar opens showing the balance with a field for the amount. Type what the customer paid and click Record.
Pay the full amount and the invoice flips to Paid with a balance of $0.00. From that point it’s read-only: the only button left is PDF, and a paid invoice can’t be voided.
Part payments work too. Record less than the balance and the invoice becomes Partially Paid with the remaining balance shown. You can’t record more than is owed: Techvia rejects any payment above the outstanding balance.
Use Void only on an invoice with no payments recorded, such as a draft raised against the wrong customer. Don’t void an invoice that has a partial payment on it: in the version we tested, that was allowed and left the received money attached to a void invoice.
Step 5: See it on the dashboard
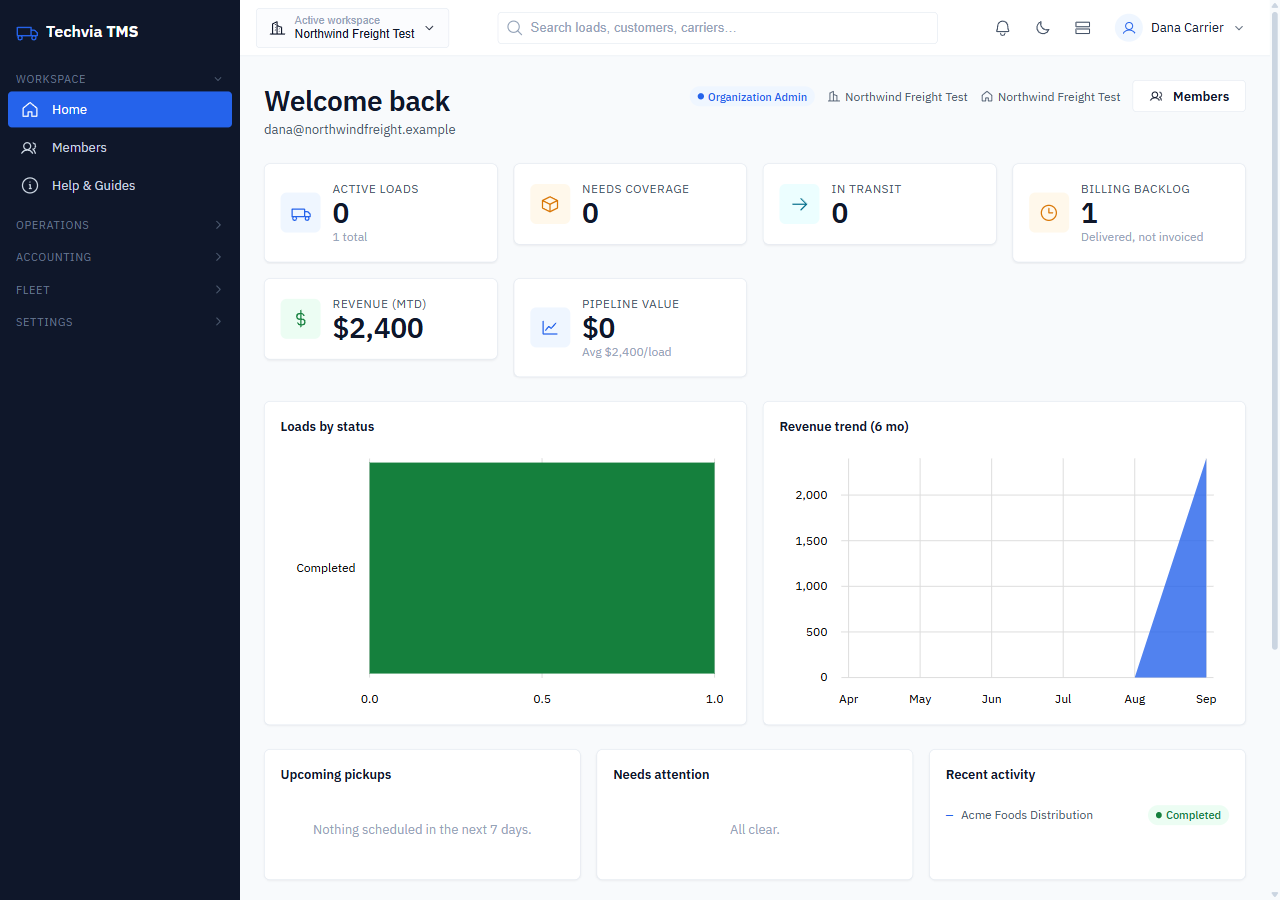
Head back to Home. The load now shows as Completed in recent activity and appears in Revenue (MTD) and top customers.
What you’ve built
Across the series you created a workspace, added a dispatcher, set up a customer, facilities and a carrier, booked a load with a live margin and taken it all the way to a paid invoice. From here the natural next steps are carrier and driver settlements, so you also pay people accurately, and the driver settlement calculation guide if you run your own trucks.
Try it yourself
Techvia TMS is $49 a month with unlimited users and trucks, with no credit card needed to start. Book a test load and run it all the way to Paid.